

We woke up bright and early last Saturday for our drive down to Shenny. Although we weren’t going to be able to paint that day (the low temperature was forecast to be in the upper 30’s), we were feeling cheerful because it looked like all systems were go for Sunday. It was going to be a bright and sunny weekend, and we still had plenty of things to take care of.
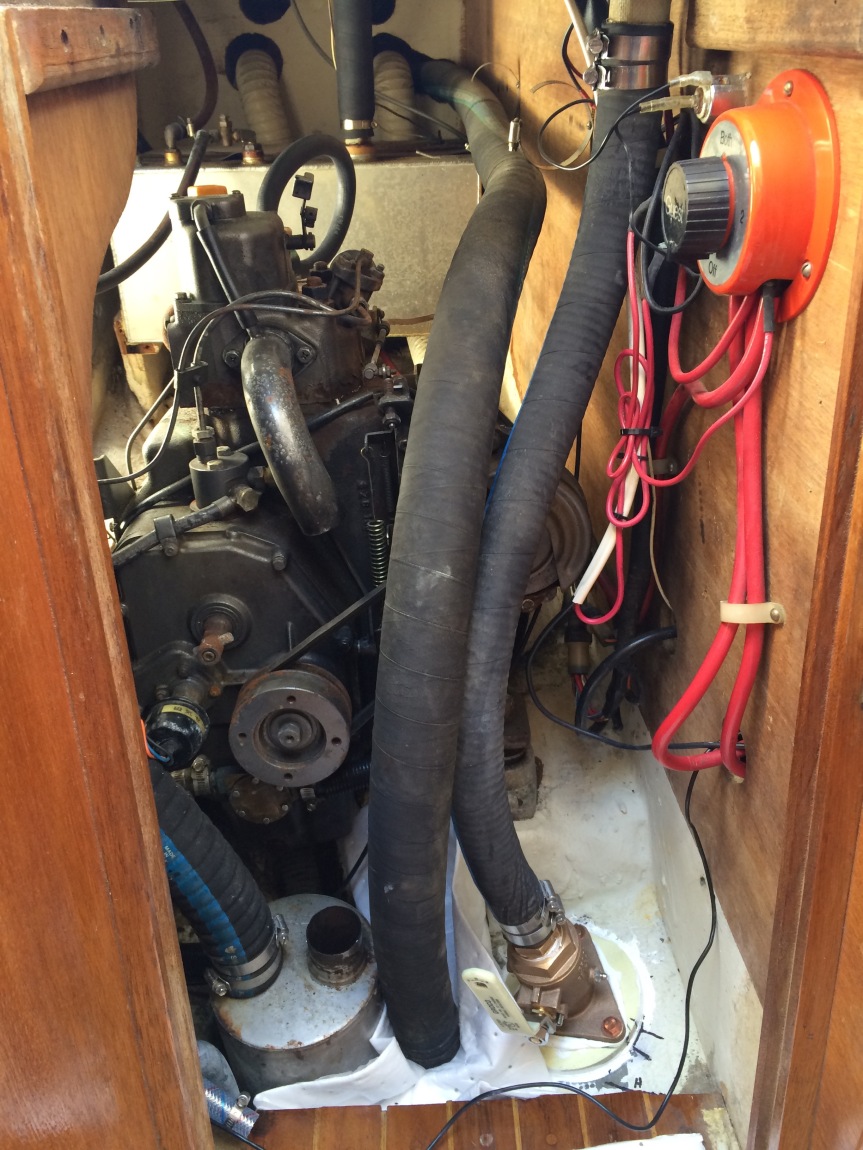
We arrived at the boat (after our weekly stop at Defender) ready to start the weekend with replacing the exhaust hose on the engine. During Pegu Club’s survey, the surveyor had pointed out cracks in the hose . He had also suggested raising the hose higher to help keep following seas from entering the engine via the hose. We had done some research and discovered there were some elaborate ways to prevent this from occurring, but simply raising the hose up higher above the waterline was going to have to suffice for now.
Although Pegu Club has great engine access, we were a bit apprehensive about the difficulty of this job. Exhaust hose is heavy and unwieldy, and we had thirteen feet of it that needed to be installed. The new hose had been coiled in the back of the car for a few weeks, so Jeff began by putting it in the sun in the hopes that it would loosen up while we worked on removing the old hose.
While the new hose warmed up, Jeff went into the pit of despair (aka the rear lazarette) and was pleasantly surprised to find that he was able to remove the old hose from the exhaust hole (or whatever the technical term is) without having to wrestle with it too much. Then he went into the cabin to remove the hose from the muffler while I climbed into the starboard lazarette to remove the clamps that were holding the hose in position.
Unfortunately, before I was able to wield my screwdriver we had a slight delay caused by my attempting to guillotine myself with the lazarette lid. I was in the lazarette peering out and down into the cabin, and we hadn’t yet tied the lid off, when a gust of wind blew it down. The lid was unable to fully close because the back of my neck was in the way. Ouch. Some tears followed, but soon we were back at work – with the lid tied open.
We removed the old hose much more quickly than we expected. After seeing how easy it would be to access the zinc without the hose in the way, we decided to put a pause on the exhaust hose project so we could change the engine zinc.
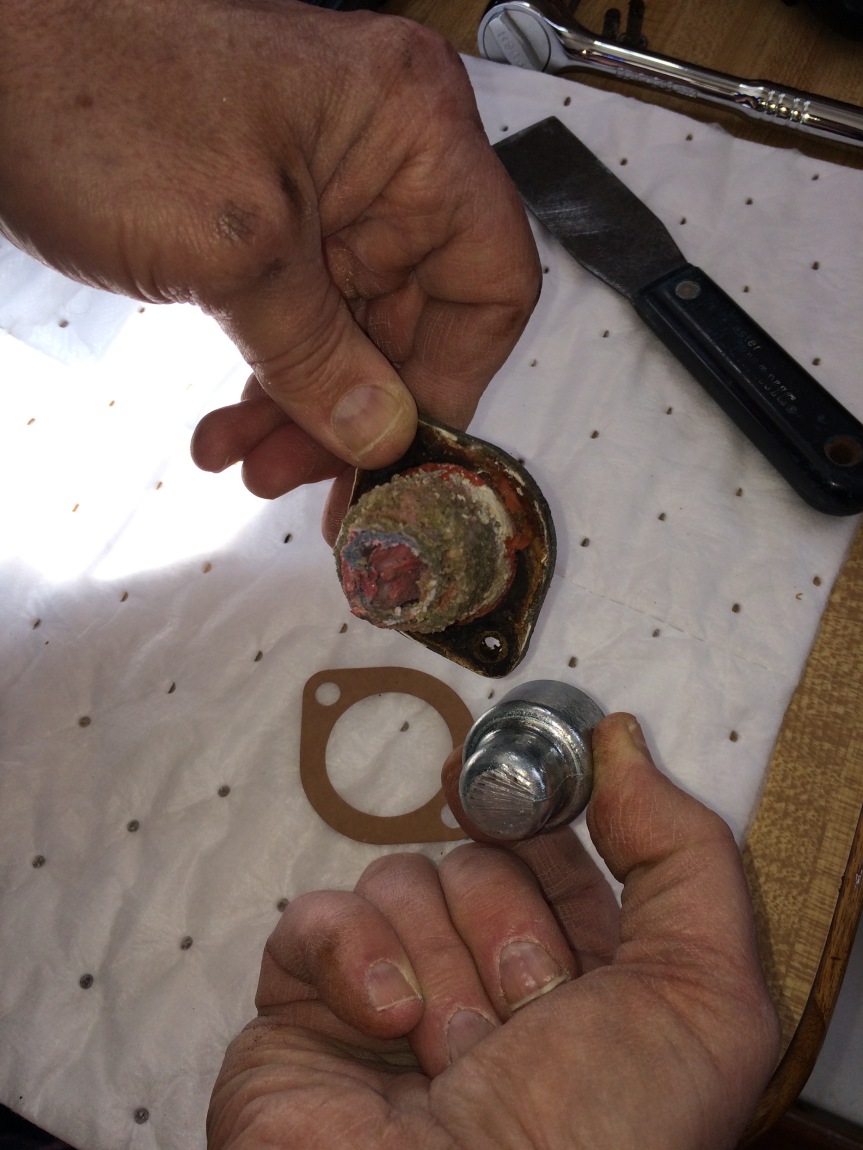
A zinc is a sacrificial anode in our engine that protects it from corrosion (we also have one at the end of our propeller). Since the engine has different metals and saltwater is an electrolyte, when the saltwater cools the engine the water creates a galvanic circuit. Zinc is the least noble metal so by placing a zinc in the engine, the zinc corrodes instead of the engine.
Pegu Club’s zinc had been an object of mystery for a while. Initially we weren’t sure if the engine even came with one. Then we weren’t sure where to find it. After staring at our rorschach blot of a picture in our engine manual Jeff had a pretty good idea of where it might be, but I wanted to wait for confirmation from our diesel guy before we began to unbolt pieces of the engine. John confirmed that Jeff was right, so we had sourced a zinc for our 1977 diesel and added it to our list of things to do.
Well, it’s a good thing that we did. When Jeff pulled out the old zinc it bore only a slight resemblance to the new one we had bought. It was obvious it hadn’t been changed in quite some time:
With that task out of the way, it was time to get back to installing the new exhaust hose. After raising the existing clamps as high as we could, we threaded the new hose from the cabin to the stern without too much of a struggle. It would have been a different story if we had tried this project during the winter, but because we waited until spring the hose was much more pliable. Overall this task ended up being far easier than we expected. Such a rare occurrence!
After exchanging high-fives we quickly finished connecting the galley sink drain to the new seacock, and now we have a working galley sink! Well, it will be working when we fill the water tanks.
Next up was to install the vent hose for the Nature’s Head. We had already planned to use the existing hole which used to be dedicated to the holding tank pump out. The old deck fill wasn’t flush with the deck, so we had purchased a new one so that we could place the mushroom vent over it.
Unfortunately when we removed the old deck fill we found the rest of the damp core that we had originally seen at one of the chainplates a few weeks ago. It wasn’t entirely surprising given that the two areas were right next to each other, but it did mean that we weren’t going to be installing the Nature’s Head vent because Jeff was going to need to dig out some more core. At least this time the core was merely damp as opposed to wet. By the time he was done we believed we had managed to remove it all from that area.
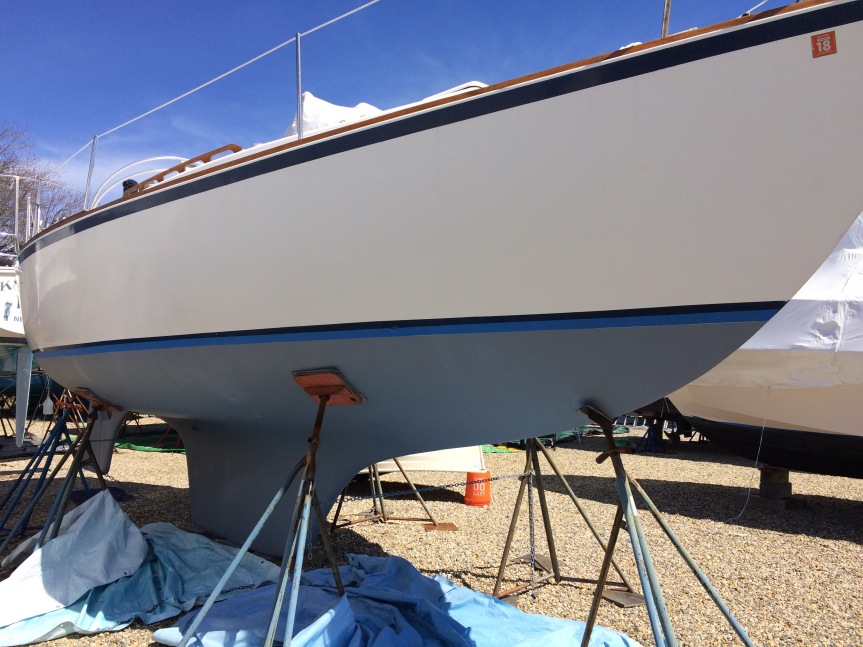
The next day found us back at Shenny with some epoxy work on the to-do list. But first: painting! We finally had a good forecast. Sunny, low 60’s and most importantly, a low of 42 degrees – one degree higher than the recommended cut off. I taped off the waterline while Jeff mixed the Interlux Interprotect 2000E. Several people from the club stopped by to give us a thumbs up – they all knew we had been wanting to get started on the final part of this big job for quite some time.
After all of that waiting, the painting itself went very quickly. Jeff used the roller while I cut in with a brush on the rudder, and before we knew it we were finished with the first coat. We were hoping to get two coats in that day, so while we waited we worked on epoxying the vent hole from the day before.
We had come up with a plan on the drive home the day before. We would use a hole saw to cut a plug out of our extra G10 (the fiberglass board we had purchased for our backing plates). The plug was going to be slightly smaller in diameter than the existing hole, so we would then use a syringe to squirt epoxy where we had dug out the core, insert the plug, and epoxy around it. The intent was to create a solid plug, and after letting the epoxy cure we would cut out a smaller hole next weekend for the new vent. It took awhile but it all went according to plan, so we then turned our attention back to our paint.
With bright sunshine, warm temperatures, and very low humidity, the first coat had dried extremely quickly. After checking the forecast once again to make sure nothing had changed – nope, still 42 degrees for the low – we decided to put on the second coat.
By the time we were finished we were getting pretty tired, but we had one last thing we wanted to take care of. Pegu Club had been nameless since Jeff removed her old name a few weeks ago. It was time to put her new name on the stern.
Jeff inspected the positioning of the graphics –
And after carefully removing the backing paper and application tape we were finished:
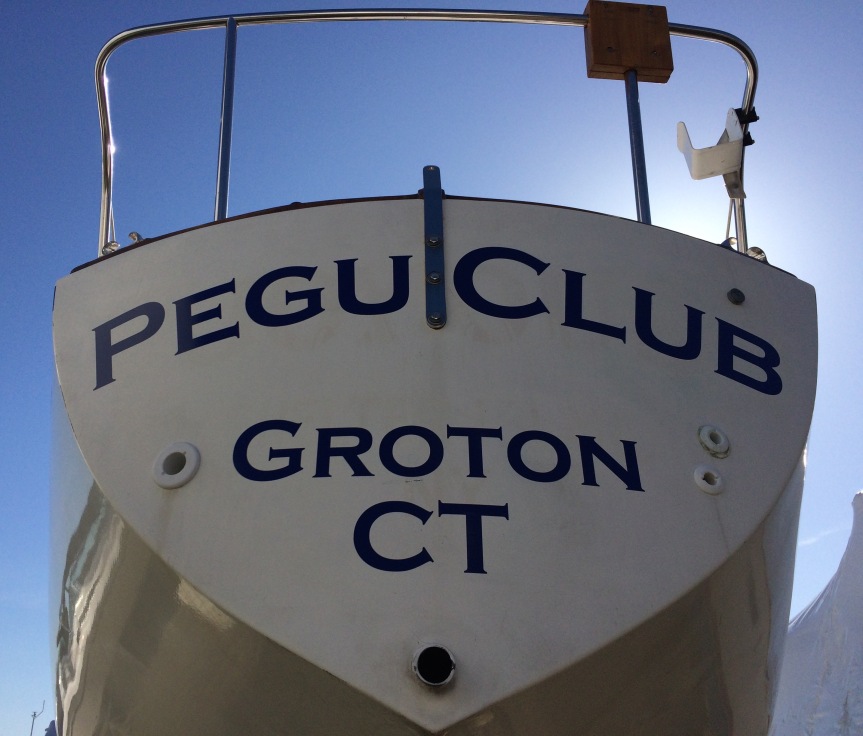
Ta-dah! We drove home feeling very satisfied. It had been a productive weekend, and now that we had been able to start painting the end of a very long off-season was truly in sight.

Good going, you two. The boat wil be in the water before you know it!
LikeLike
Thanks, Dad. That’s what we keep telling ourselves.
LikeLike
Looks wonderful. Great paint job. You both work so well together and Jeff has so much knowledge about how things work. You both are lucky to have each other. How is your neck? No picture of you cutting your head off? Love, Nikki
LikeLike
Thanks, Nikki. We are definitely very lucky. 🙂 My neck was a bit tender on the skin for a few days, but it feels fine now. I’ll make sure not to do that again!
LikeLike
Tremendous progress! Sorry I missed the epoxy coat; it sounds straight forward after the hard prep work. 13 feet of hose, that is almost half the boat length! Is there any concern with the vent taking on water? A lot of water can run along a toe rail, consider if you took water over the bow while on port tack.
LikeLiked by 1 person
Correction, starboard tack, with the port rail down.
LikeLiked by 1 person
Thanks, James! Actually, the mushroom vent can be screwed closed under those conditions, so no worries there.
LikeLike
Mind sharing how much barrier coat and bottom paint you ended up using?
LikeLike
Hi Phil, we put four coats of Interlux Interprotect 2000e on for the barrier coat. Each coat used a bit less than a gallon. For the bottom paint we put one coat of green and another of blue. One gallon for each, but we had some left over. Kimberly
LikeLike