

After taking care of our propeller shaft stuffing box last fall, it was time to turn our attention to the rudder shaft stuffing box. Jeff had noticed during last season that the hose surrounding the stuffing box was very old with many signs of serious cracks. Given that a rupture of the hose would result in a significant amount of ocean water coming into the boat, we knew we needed to take care of it this offseason.
Unable to find anything online about servicing the rudder shaft stuffing box, we were essentially going to have to go in blind for this project. Not surprisingly with a 40 year old boat, its been a challenge, and unfortunately we’re not finished yet.
Some disassembly was required before we could begin. The rudder shaft stuffing box is located underneath several pieces of wood, which in turn is underneath the steering drive wheel, which is underneath a wood cover. Removing the first wood cover was easy. After that it became more difficult.
In order for the steering drive wheel to be removed, Jeff had to remove the bolts that were holding the cable in place. They look like you should be able to simply turn them, but since they hadn’t been in touched in who-knows-how-long, it was a bit of a struggle.

Fortunately this was a bit of a twofer, because we’re going to get a new steering chain and cable this spring so we would have had to remove this piece anyway. And I’m using the word “we” liberally since Jeff is really the one who is doing all of the work. As you can see by the next picture, this is a one-man job:
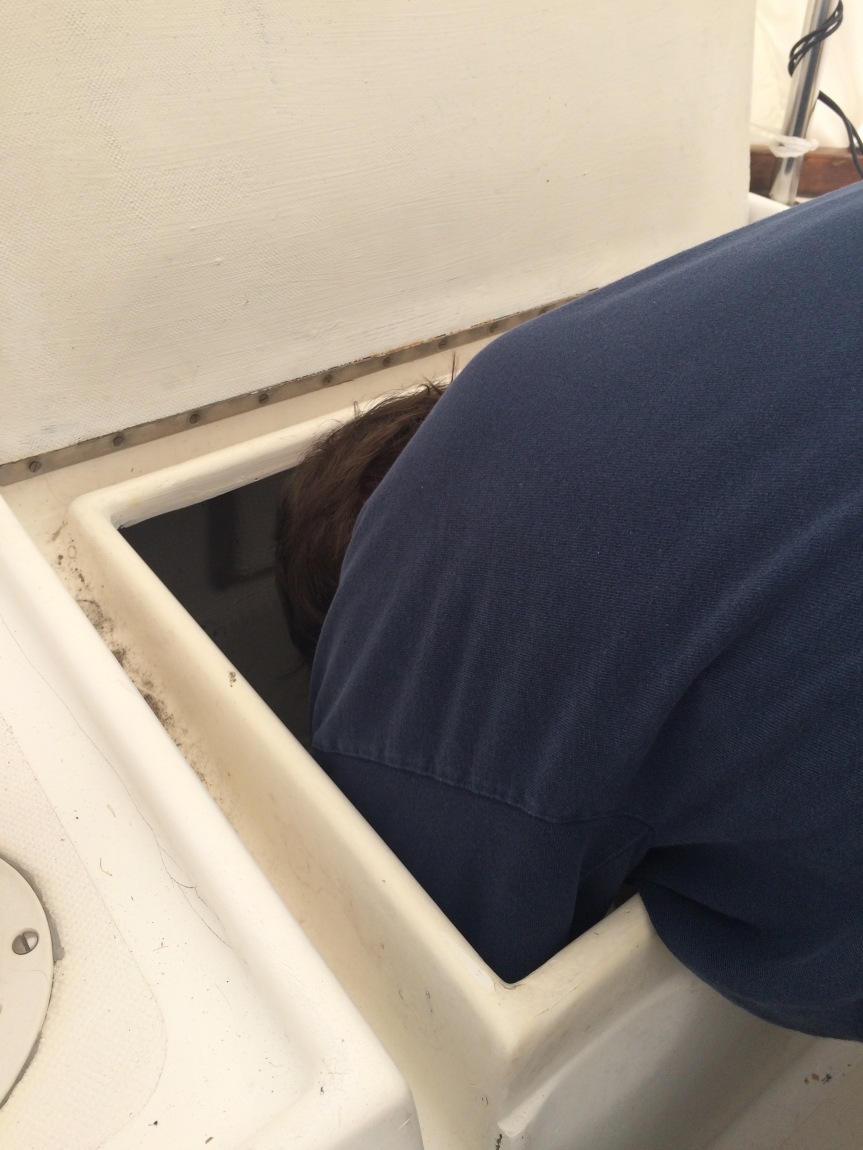
Once the steering drive wheel was out, Jeff’s next challenge was this:
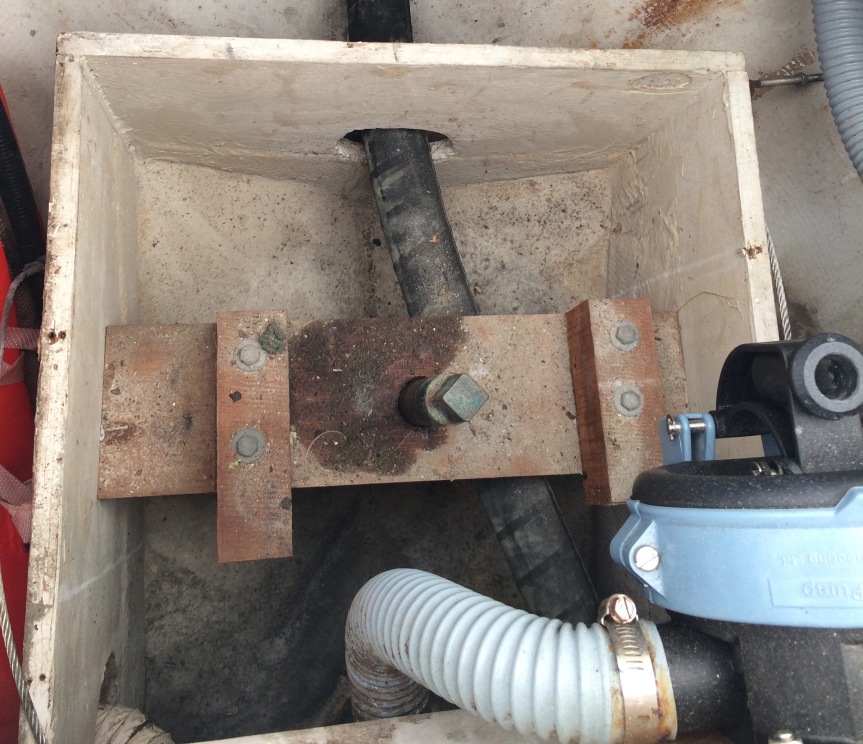
The diamond-shaped metal piece in the center is the top of the rudder shaft. We needed to access the shaft, so the wooden board had to be removed. The wood was held in by four bolts that were on either side of the box. While they weren’t visible, Jeff could feel them when he put his hand underneath the wood. The bolts were stubborn, but they eventually succumbed to Jeff’s will. Now he was looking at this:
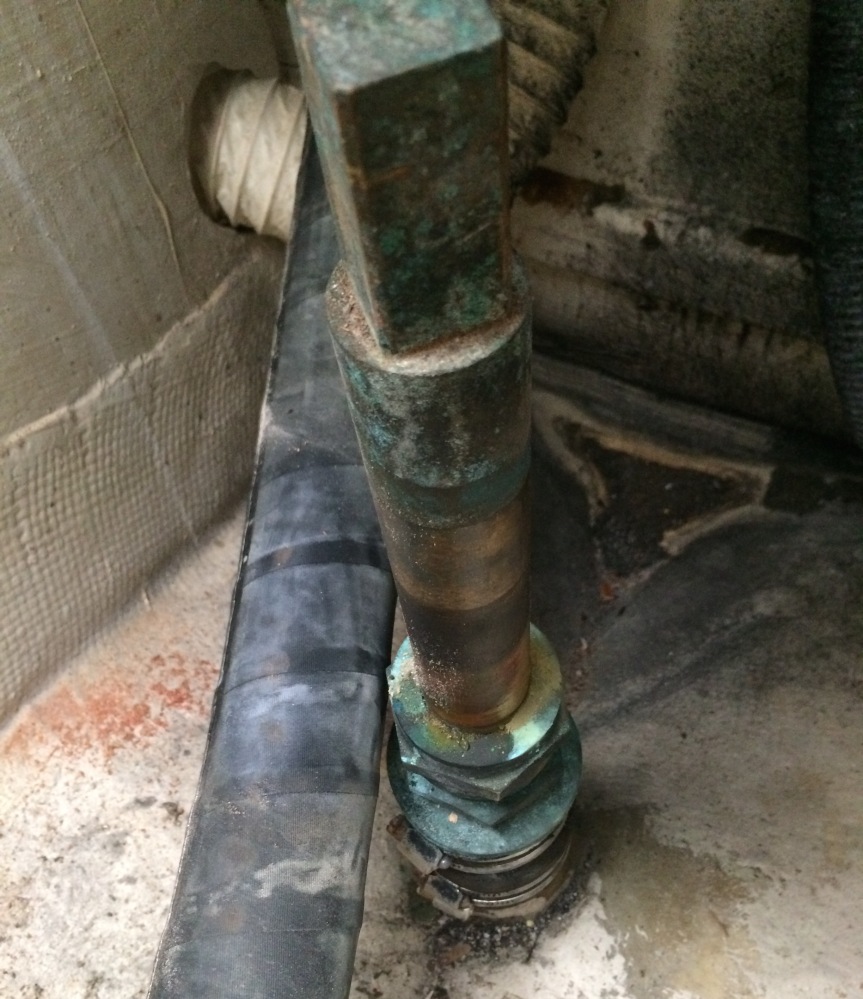
A close up (you can see the offending hose at the bottom):
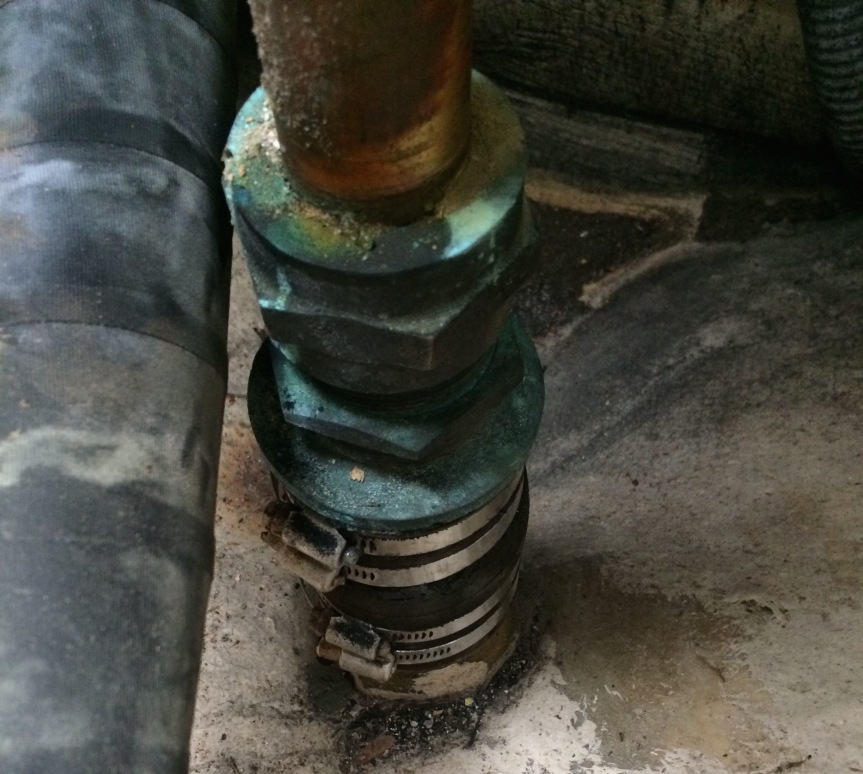
The rings and nuts came off with surprisingly little effort. This was going well so far! Then it got hard:
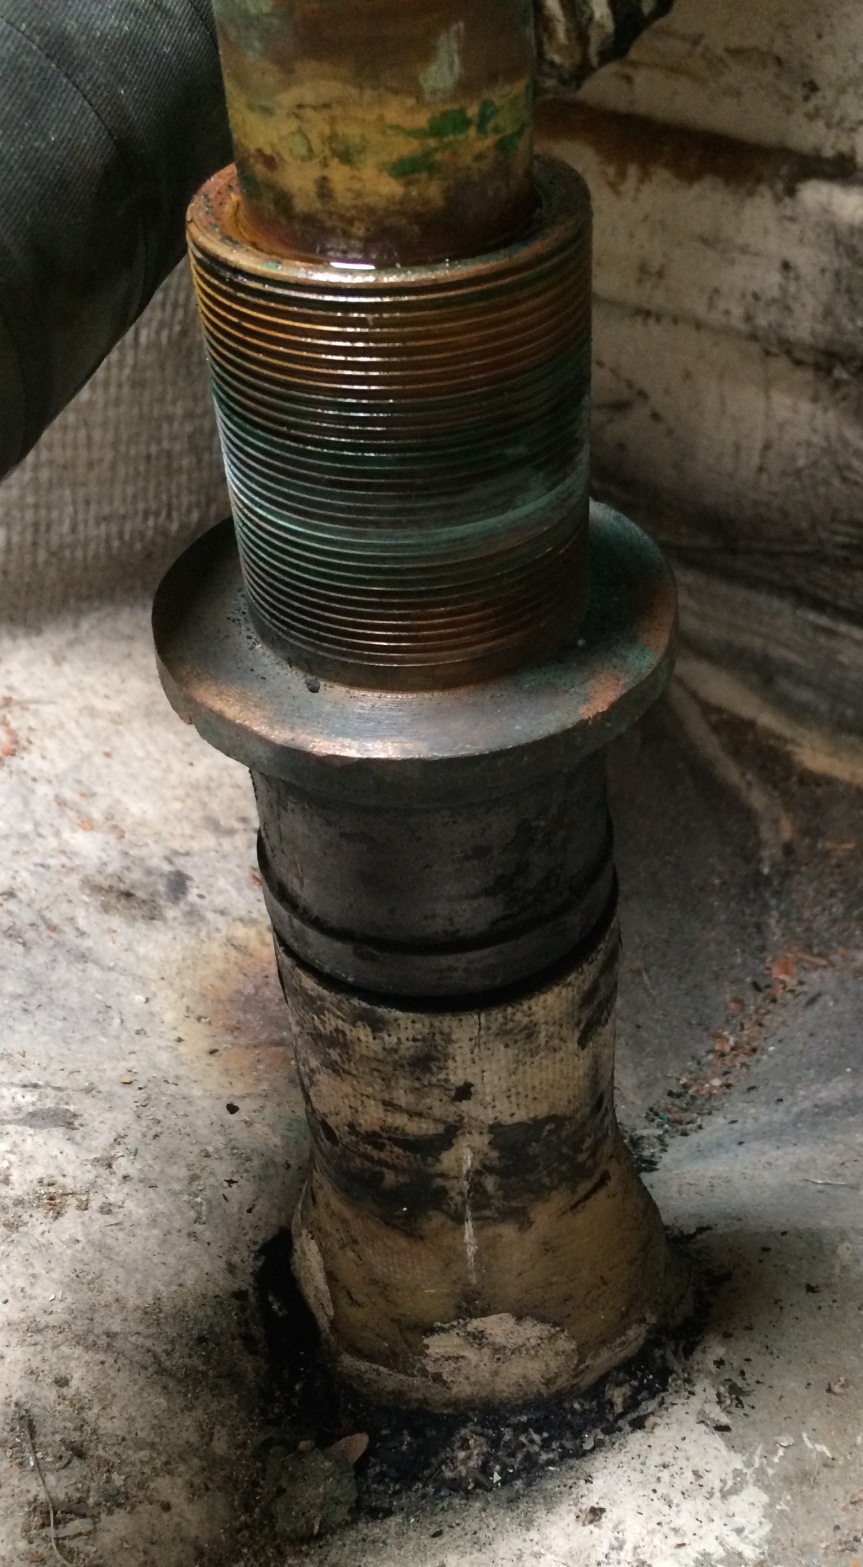
The picture above shows the part of the stuffing box that is corroded in place (with the hose already cut off). The rubber hose was below the flange. As you can see, there’s no way we can get a new hose on without removing this part of the stuffing box (because the hose won’t fit over the flange). This part of the stuffing box, from the threaded area at the top of the picture down to where the metal ends, should slide off of the post (which you can see above the threaded portion). Wrap the new hose around the bottom of the stuffing box, slide the entire piece over the rudder post, quadruple clamp the hose, put new flax in the stuffing nut and you’re basically finished. Of course first we need to get this piece off, and it’s had forty years to fuse itself onto the rudder post.
Below is the offending hose that started this whole thing. You can see all of the cracks – and that’s the good side of the hose. The other side had areas where the cord was exposed. It’s definitely time for a new hose.

After using PB Blaster and an assortment of wrenches, we weren’t getting anywhere. It was clear we were going to need to crowd source this issue. Fortunately, Bristol owners have an active Facebook page and Yahoo Group, so I posted on Facebook and received several good suggestions. We won’t be back at the boat until Friday the 14th, but with a 3 day weekend to work on it I’m confident that we’ll conquer the corrosion before that weekend is finished. Onward!

Wow! Not to make light of your situation but I sure appreciate you going first. So I’m guessing the only way to see the condition of the hose was to remove everything in the previous steps?
LikeLike
You can see the rubber boot without disassembly, but you need to get your head down in there with a flash light. You will be able to see the back portion of it. Besides, hanging upside down is all the rage 🙂
Jeff
LikeLike
I have the same problem with the rudder stuffing box and rudder bearing on a 29.9 Bristol. Your comments and photos were very helpful. Did you return to complete the fix and, if so, do you have comments and photos that you could add to your blog post? Would be greatly appreciated. Many thanks!
LikeLiked by 1 person
Hi Steve, I have some details on our additional attempts to free it on the “Time to Call in the Professional” post. We have a mechanic coming this week who I believe is going to use a hydraulic puller get it out. In talking to him it sounds like it’s not an uncommon problem. I’ll be sure to post at the end of next weekend with details of how it worked out. Fingers crossed!
LikeLike
Hi Kimberly –
Thanks so much for your reply. I read your posting “Time to Call in the Professional” after you mentioned it. I had missed it previously: did not realize that it was a follow-up on the same stuffing box problem. I’m sorry that you were not able to get it off and so now need pro help. I’m sure that will work.
We eventually were able to remove our stuffing box sleeve and the stuffing box with some hard labor head-down in the stern lazarette. We’ll replace both the sleeve and the stuffing box packing then reassemble it. By the way, this may be obvious but I’ll mention it anyway: did you fully loosen the stuffing box compression nuts, liberally douse it all with penetrating oil (which you did do) and lightly sand the rudder post with fine sandpaper to clean off the corrosion above the stuffing box? Those steps are what worked for us, along with a few raps with a soft hammer.
By way of what may be a helpful explanation, this was our first encounter with this specific rudder problem. It had developed a loud creaking sound on a port turn. So we began pulling it apart, including of course the radial drive wheel and steering cables in order to get at the stuffing box. These maintenance probes are like Russian dolls, one issue reveals another issue and so on. Along the way we discovered that the steering cables were badly frayed, especially at the chain drive connector ends in the pedestal, and needed replacement. So this probably saved us from an otherwise unanticipated and dangerous steering failure under load. Suggest you do a thorough inspection of the steering, if you’ve not already done so, since you’ve got it partly disassembled anyway.
I’ve copied a friend, Tim Moses, on this email for his information. Tim owns the 1978 29.9 Bristol on which we are working. I help out as best I can with repairs, restoration, etc, each year and get in some great sailing along with it. I drew the research card so I’ve been on-line looking for Bristol rudder repair info. There is precious little available specifically about Bristol repairs so your blog was a happy find.
We are still interested in your follow-up blog and photos as you fix the problem. We have much to learn. And this is reciprocal so let us know if we can help you with info too.
Thanks again, Steve
>
LikeLiked by 1 person
Thanks, Steve! I’m glad that you guys were able to get the stuffing box off. Our compression nuts came off very easily, but it turned out to be a tease once we got to the box itself. The corrosion appears to be limited to what is directly beneath the stuffing box, based on how it looked when Jeff was able to move it down 1/4″. Ah well, boats are a labor of love!
Lucky that you were able to replace the steering cables before finding out about them the hard way. We’re definitely going to be inspecting them before we reassemble everything, and likely ordering a new chain and wire assembly for replacement this summer so we can cross another maintenance item off of the list.
Thanks for the kind words on the blog, and there will absolutely be a follow-up post. I’ve received quite a bit of useful advice from other people’s blogs that it’s nice to be able to pay it forward.
Where do you two sail out of? I certainly won’t hesitate to reach out with future projects!
Kimberly
LikeLike
Hi Kimberly –
We sail out of the Harlem Yacht Club on City Island, NY.
We’ll be working on the boat over the next several days and will send you some pics of our rudder issues and repairs. Meanwhile good luck with your own boat labors.
Thanks again, Steve
>
LikeLiked by 1 person
Thank you for the detailed info guys. We are starting to deal with some of these ussues as well on Señora del Mar. Looks like our wheel quadrant has sunk down a bit and is rubbing on the wood block and bolts which caused some of the bolts to break of the wooden block. And yes, the rubber boot is in poor shape. The only problem is she is currently in the water. May have to remove her just to fix this issue. May I ask what they charged you to remove the final assemly so I have an idea? Thanks!
LikeLike
Hi Dennis – we ended up paying $450.00 which included breaking the stuffing box free with a hydraulic puller, polishing the shaft and inside surface of the stuffing box (and lubricating it), repacking and reinstalling the stuffing box, and replacing the rubber boot and clamps. Good luck! Kimberly
LikeLike
Thanks for all the Great information….. I am just starting this process on our B-24 (Summer Wind) which uses the same stuffing box……
LikeLiked by 1 person
I’m glad it was helpful. Let me know if I can answer any questions. Good luck! Kimberly
LikeLike
I have similar problem in that the stuffing box on my bristol 29.9 hull No. 89 is 42 years old. While the box is located above the water line it, due to its age, it should be changed. Is a bushing fit in the fiberglass bossing? From viewing the arrangement on the boat I don’t see an upper bearing on the rudder post.
LikeLiked by 1 person
Hi Tom – our 29.9 definitely doesn’t have a bearing or bushing above the rudder stuffing box. The steering cable wheel holds the upper part of the rudder post vertical, and in place. We don’t know if there is a bushing in the lower end, but Jeff thinks there likely is. However, our mechanic (who was excellent) didn’t make any note of there being an issue with the lower end. Hope this helps, and good luck with it! Don’t hesitate to reach out if you have any other questions. Kimberly
LikeLike
Hi I just got done with pulling that bearing flange out. I ended up using a bearing puller, and left it under tension when we couldnt raise it any more. Let it sit for 6 days with the tension, and then it came right up. I had a shipwright scheduled to come in this week but it popped up on Sunday. What fun! Bill Medrano – Bristol 29.9 hull 56, Marlboro Yacht Club NY
LikeLiked by 1 person
Congratulations on getting it out! It does seem to be a problem for a lot of 29.9 owners, but now you won’t have to hassle with it again. 🙂 Kimberly
LikeLike
Was your mechanic in the New York area?
LikeLike
Hi Martin – we used John Bayreuther. He’s based out of Niantic, CT but he travels all over. He’s great! Kimberly
LikeLike