

Our Catalina 30 boat-yard neighbor (who is also getting a new engine this winter) gave us yet another good idea for saving a bit of money on the engine installation. Thanks to his suggestions we had disconnected all of the wiring and hoses before the engine was removed (saving several hundred dollars in labor costs already), and we will be reinstalling the sink ourselves. Talking to him a few weeks ago, he mentioned that he had recently installed his new engine control panel. Of course! Why didn’t we think of it? So last weekend saw us down at Dutch Wharf doing exactly that.
The timing was actually pretty good for this small project because a few weeks ago I fell on my way to work, bruising my ribs. This seriously limited the boat projects we could do because I couldn’t climb down into the main cabin. The sink has been removed for the engine installation so the stairs are not in place (they don’t have the same lateral support with the sink out). That means getting into the main cabin involves stepping onto the edge of the quarter berth which is a LONG way down for me. At 5’3″, I don’t exactly have the leg length of a supermodel. Until the steps are back in place, climbing down (and back up) involves a lot of upper body work which I was definitely not in any condition to do. Keeping Jeff company while he completed a relatively easy task that didn’t involve going down below? That I could do.
The wires to the old Yanmar control panel had already been disconnected, so it was easy enough to unscrew it and pull it out.

Of course the required opening for the Beta panel was different than the Yanmar, so after using a jabsaw to make some small modifications, Jeff next turned his attention to the backing plate.
Since the Yanmar panel was rectangular while the Beta is square, we decided to use a piece of 1/4″ Starboard for a backing plate. Jeff marked where he needed to cut the hole so that the panel would sit flush against the Starboard, and then used the Dremel to cut it out. He said if he were to do it again, he would have simply used the jabsaw to cut the hole because the Dremel melted the edges of the Starboard, but a bit of light sanding took care of the rough edges. Then he used a palm sander to bevel the outside edges of the Starboard.


Dremelling (is that a word?) and sanding.
We used 5200 to install the Starboard, and then put duct tape over it so it wouldn’t slide down before it cured. The forecast called for a 20% chance of showers for a few hours overnight, so in an abundance of caution we taped a garbage bag over the whole thing and called it a day.


Our tradition when we’re finished working on the boat for the day is to take a beer (for Jeff) and a cider (for me) down to the dock and look at the river. While we were walking the dock we watched a guy ghosting by in a 19 foot Cape Dory. As he sailed by he asked which boat was ours, and I said ours was on the hard. “We’re just watching you!”. He replied, “Boy, it’s been a long time since a woman said that to me – especially in front of her husband!” and we all laughed. Next thing we knew he asked if we wanted to hop on! Never one to pass up a sail – especially in November! – we quickly said sure and he sailed up to the dock. We enjoyed a spontaneous ghost of a sail on the Branford River for about an hour while we all chatted and carried on. It was great to be back on the water again, even if only for a little bit. Boaters are so awesome!
The next day we were back at Dutch Wharf to finish up our little project. The 5200 had cured nicely overnight, so we put butyl tape on the back of the control panel, set it onto the Starboard, and used screws to hold it in place. Well, first we did have to cut the hole a TINY bit larger. It seems that the Starboard slid down a fraction of an inch before it cured, but no big deal. We’ll clean up the excess on another weekend.
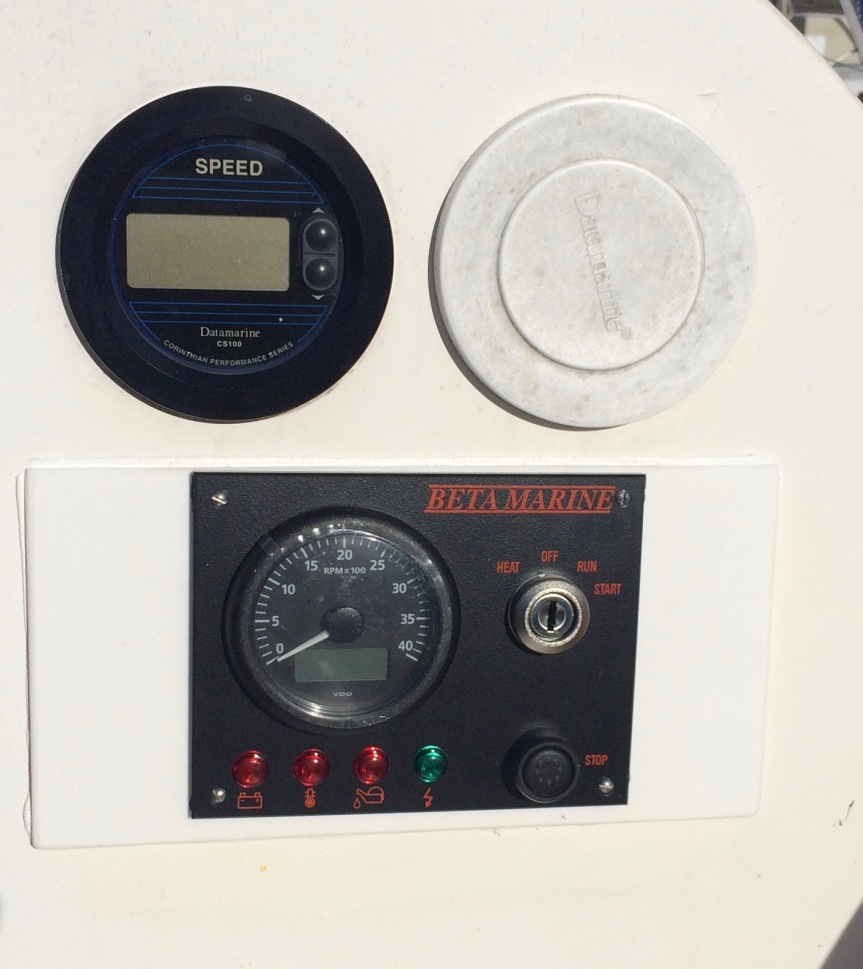
As we sat there admiring our work and congratulating ourselves on saving several hundred dollars in labor costs, I suddenly looked at Jeff and said, “Hey, where’s the fuel gauge?” We looked at each other and looked at the panel. Damn it! We had our choice of several panels and we picked the least expensive one that had a tachometer and an hour meter, not even noticing that there wasn’t a fuel gauge. “How can you sell a panel without a fuel gauge??” “How did we not notice that it didn’t have one??” DOH! Cross one task off of the list, add another.
As soon as we got home that night, I took a look at the Beta control panel options and saw that none of them had fuel gauges. O.k. I guess we’re not complete idiots. But that doesn’t change the fact that we’ve added another task to the list. Sigh. It’s a good thing we love this whole boating thing.

Really great job! Our fuel gauge is on the electric panel inside. Jay says that’s normal. We also met another Bristol 29.9 and Jay got pictures to share with you. We will email them.
LikeLiked by 1 person
Thanks, Tanya! Good to hear that it’s normal. The inside of the electric panel isn’t a bad idea – we’ll have to think about that one. Looking forward to the pictures when you get a chance. Hope you’re having a great trip so far!
LikeLiked by 1 person
you both are so accomplished. Now where would the fuel gauge go? That is the question. So glad you are enjoying your experiences. Love, N
LikeLiked by 1 person
Thanks, Nikki. I don’t know how accomplished we are, but we try. 🙂 We have two displays above our panel right now. We’re going to remove them and replace it with one that gives us the same information. That will leave a spare opening that we’ll use for the fuel gauge display. Love, Kimberly
LikeLike