

First up: the latest on the engine. John Bayreuther was able to get to Pegu Club last week and the engine has been fixed. He told Jeff that he found a cracked washer that was letting air in, and there was also a lot of air in the injector. He ran the engine twice and all was well, so we are back in action.
This was an inexpensive fix as far as boats go so we’re holding off on replacing the engine until this winter, but we’re definitely getting a new one. Up until now Thumper has been rock solid for us, but it’s 40 years old, some parts are becoming unavailable, and we have no idea how it was treated by Pegu Club’s many prior owners. On top of it all, as a single cylinder diesel Thumper is LOUD! A new engine will certainly be expensive, but it will also be smaller, lighter, (hopefully) reliable, and much quieter.
In the meantime the guys are squeezing us in to the launch schedule so splash is this Saturday at 9:45 a.m. Yay!
Just because our splash was delayed didn’t mean that all boat projects stopped. In fact, one big project that we managed to essentially complete during our unexpected down time was finishing up new cockpit cushions. I say essentially because we still have to make the helm cushion, but the port and starboard cushions are done and those were the two longest ones. The helm cushion should be much easier by virtue of its size.
Pegu Club originally came with vinyl covered cockpit cushions. Unfortunately they were hard as a rock and also suffered from the same smell that the rest of the boat came with, so out they went. I had never made cockpit cushions before, but with my trusty Sailrite and the detailed Sailrite video on YouTube I figured I’d give it a go.
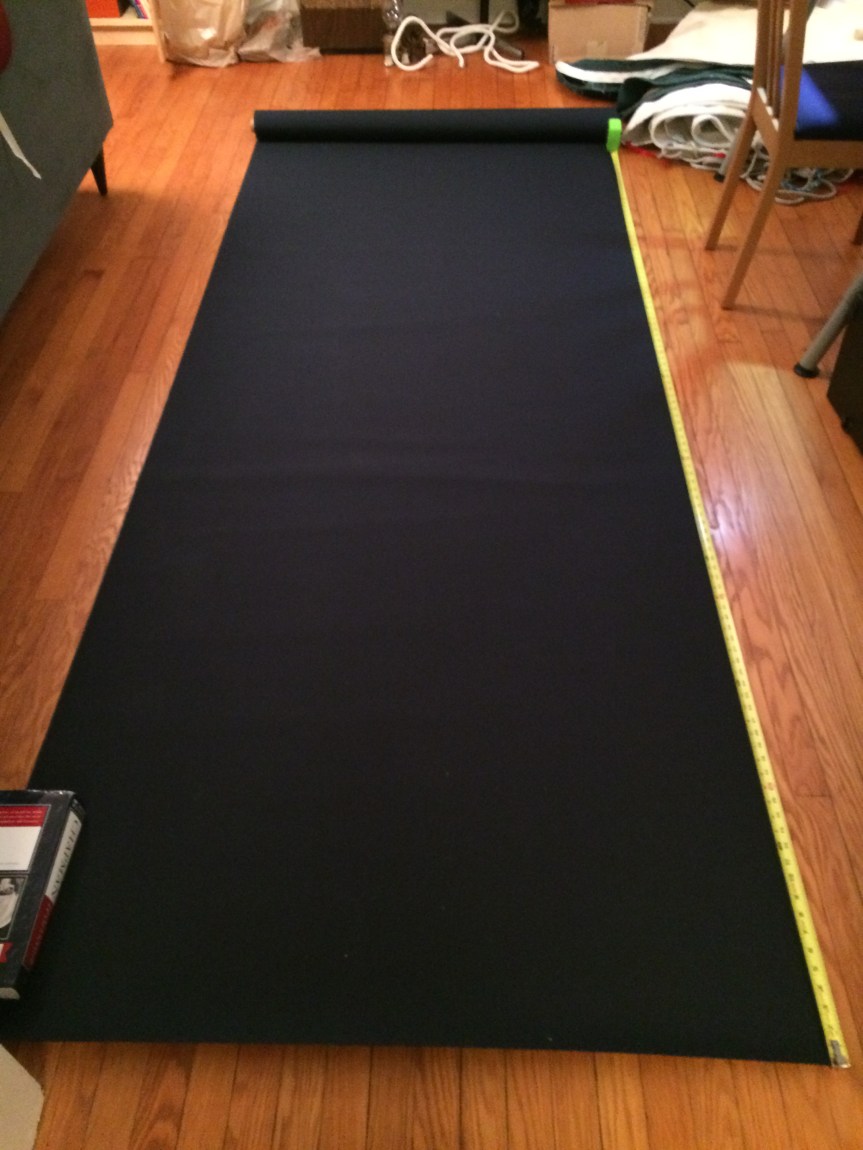
Little Bristol had reversible cushions with piping, so I decided that’s what I wanted to do. Again, I had never made cushions before and I didn’t even know that the edging was called piping, but I figured if I was going to go through all of the trouble I would make what I wanted. Navy sunbrella on one side for spring and fall (the dark color soaks up the heat from the sun and makes the cushion warmer on those cool days), white sunbrella on the other side for the summer, and piping all around on both sides. Had I only known how much extra time would go into the piping I may have decided to skip that detail, but now that it’s finished I’m glad that I did it.
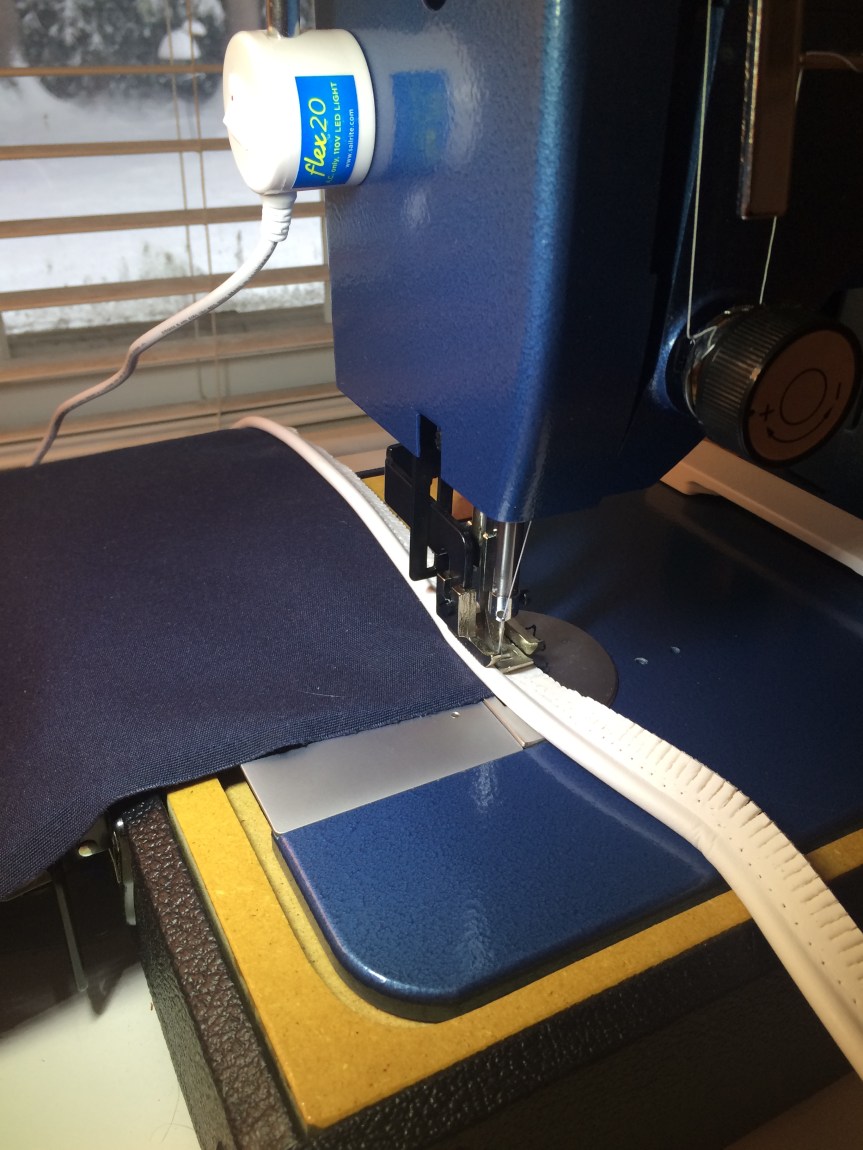
After taking patterning material to Pegu Club to get the exact measurements for the starboard and port cushions, I went to work. Measuring out and cutting the top and bottom plates was pretty easy, so after cutting two navy and two white plates it was time to start sewing the piping on.
Initially I didn’t really have the needle positioned closely enough to the piping, but I didn’t realize this until I had finished the third plate. By then I had the technique down, and when I compared that plate to the first two I really didn’t like the way the first two looked. I also realized that I hadn’t started the piping on the zipper side so there wasn’t a smooth stretch of piping on the more visible part of the cushion. Classic newbie error. Sigh. I hemmed and hawed over it for a while, but ultimately decided to remove the piping from all three plates and do them again. The fourth plate was a breeze in comparison.

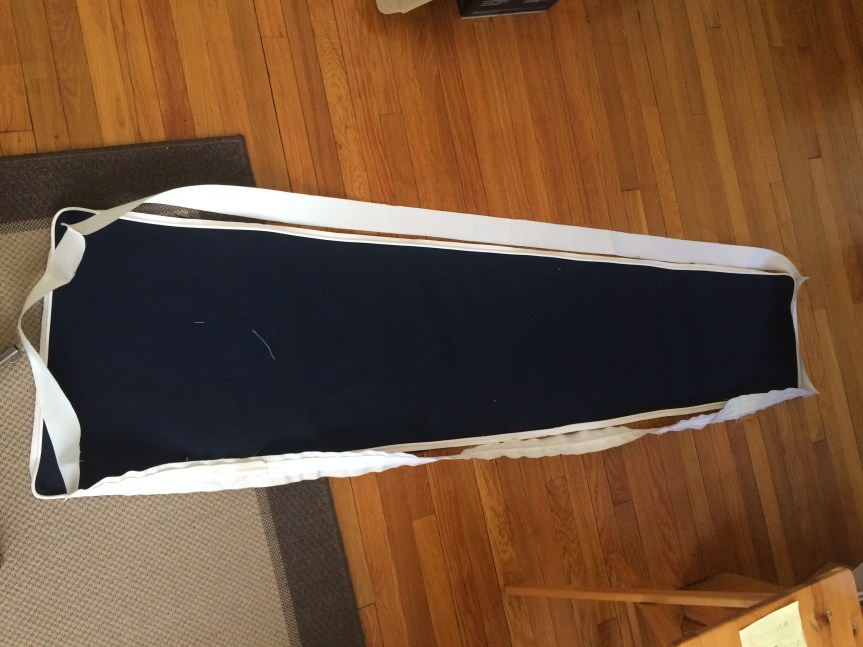
Once the piping was finished I needed to cut the narrower boxing strips and insert the zipper into the zipper plaque. This also didn’t go smoothly in that somehow I managed to mis-measure the lengths of the strips, and I also forgot to add the width of the zipper to the plaque before I cut it. Fortunately I had plenty of extra material.


Boxing strips (and the zipper plaque) on the left, zipper plaque on the right.
After the strips and the plaque were finished, it was time to sew them together and then attach them to the plates.
Then the real work began. Jeff had insisted that we should use closed cell foam (I was skeptical because I was concerned it would be too stiff, but ultimately acquiesced), so we bought a section of foam from Defender and an inexpensive electric carving knife from Bed Bath and Beyond. Although the instructions said to cut the foam so that it was slightly larger than the plates (to account for shrinkage over time), Jeff thought it would make the foam much too large to fit into the material so we simply traced the pattern onto the foam and cut it to the original size.
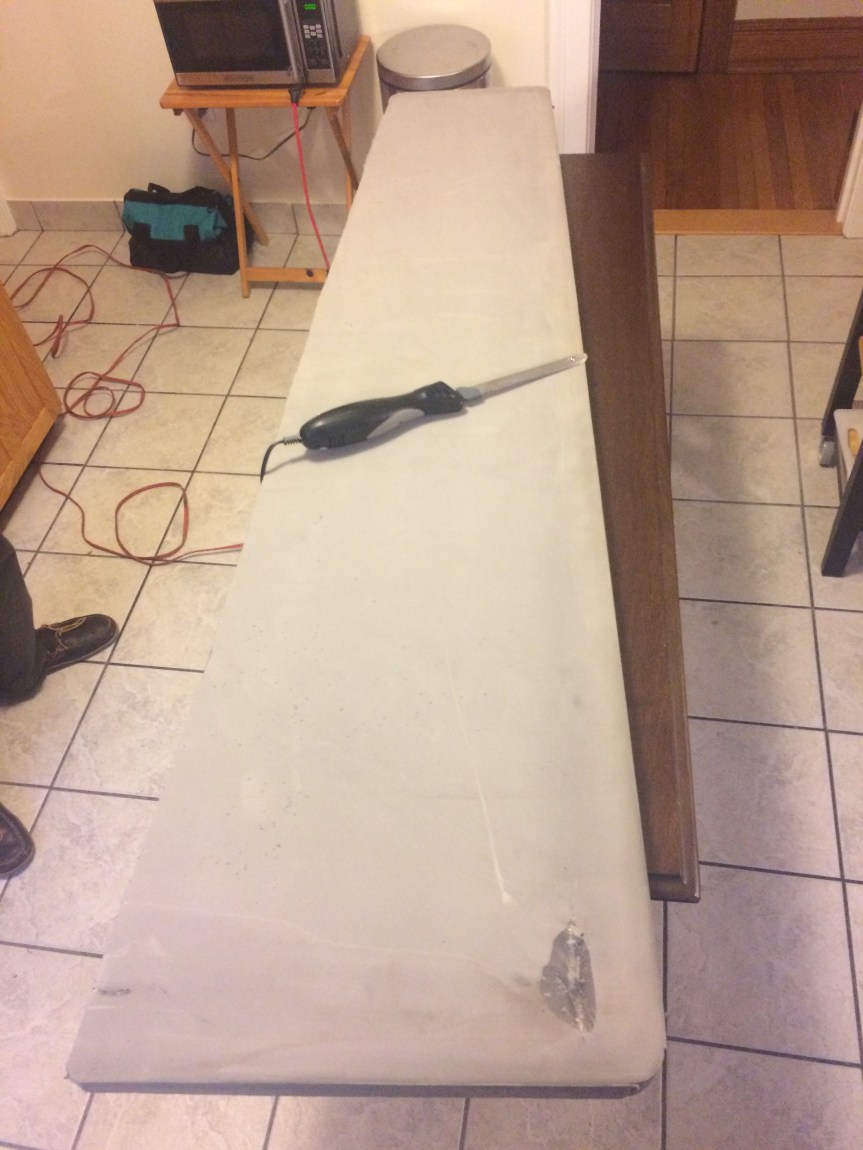
It’s a good thing that we did, because as it was we were barely able to squeeze the foam into the material. It definitely qualified as an aerobic workout – much sweating was involved along with an elevated heart rate – but eventually we forced it in. Now came the real question: would they fit in the cockpit?
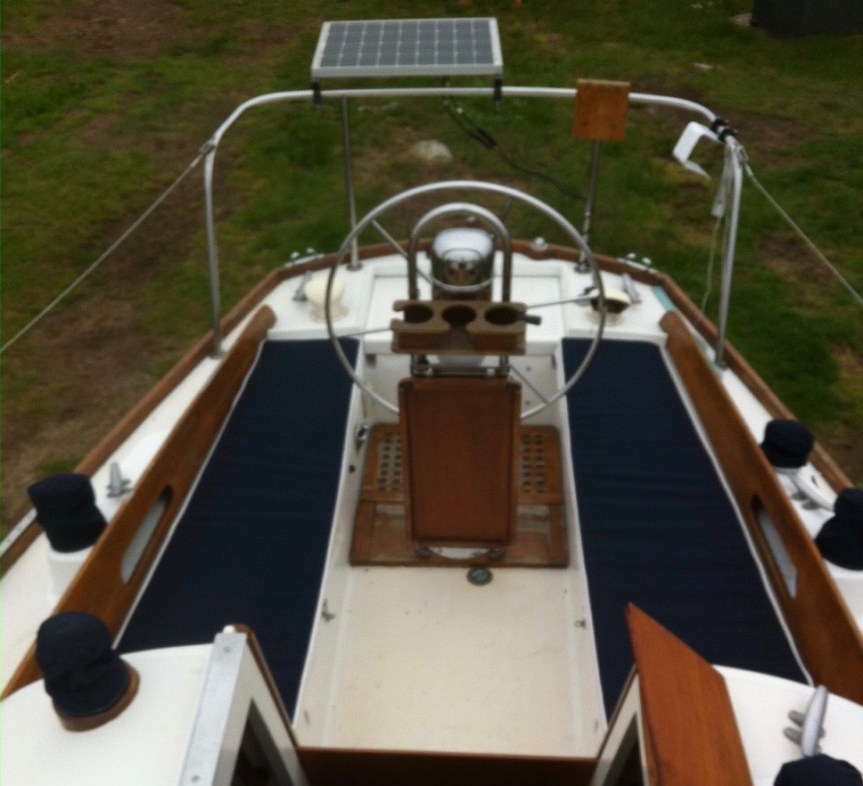
Fortunately, the answer was yes. They weren’t perfect, but it likely would have cost at least $1,500 to have them professionally made. Given that there was no way I would have been willing to pay $1,500 for perfection, I was pretty happy with the results.
I don’t want to leave anyone with the impression that I started this project a few weeks ago. In reality I started in March, 2016. Nope, that’s not a typo – 2016. The original goal was to finish them in time to use them last season, but once Pegu Club went in the water and the weather was nice, the last thing I wanted to do was spend my evenings sewing. When Pegu Club was hauled out in the fall I had to figure out where I left off, and then I picked away at it for a bit until it was time to start working on getting the house ready to sell. A few months after that I had to figure out again where I left off, but this time I was able to stick to it and finish a pretty big project. Hooray!
At this point between winch covers, curtains, and our cockpit cushions the Sailrite has definitely paid for itself with many projects still left to do (lee cloths, weather cloths, a bimini, etc.). If anyone is on the fence about buying one, my advice would be to bite the bullet and go for it. Even if you don’t know how to sew, Sailrite has videos on everything – from threading the machine, to basic sewing, to maintenance. The videos are step-by-step, top notch, and the satisfaction of knowing you did it yourself is priceless. Used machines on the secondary market are quickly snatched up for close to full price, so it will absolutely be worth the initial purchase price even if you ultimately decide not to keep it. Now on to the next project!

Progress! Well done. Enjoy splash day!
LikeLiked by 1 person
Thanks, Dad! So far the weather forecast looks quite good with minimal winds which will make getting into the slip for the first time a lot easier.
LikeLike
Hooray to your finished project and the splash down. The photos show off your beautiful cushions. Enjoy, Love, N
LikeLiked by 1 person
Thanks, Nikki! All of the work for the cushions will be worth it tomorrow when we splash! Love, Kimberly
LikeLike