Canvas (part three) – some final projects before we cast off the dock lines.

We still had some canvas work to do before we could head south, but after completing the dodger we knew it would all be easy-peasy by comparison.

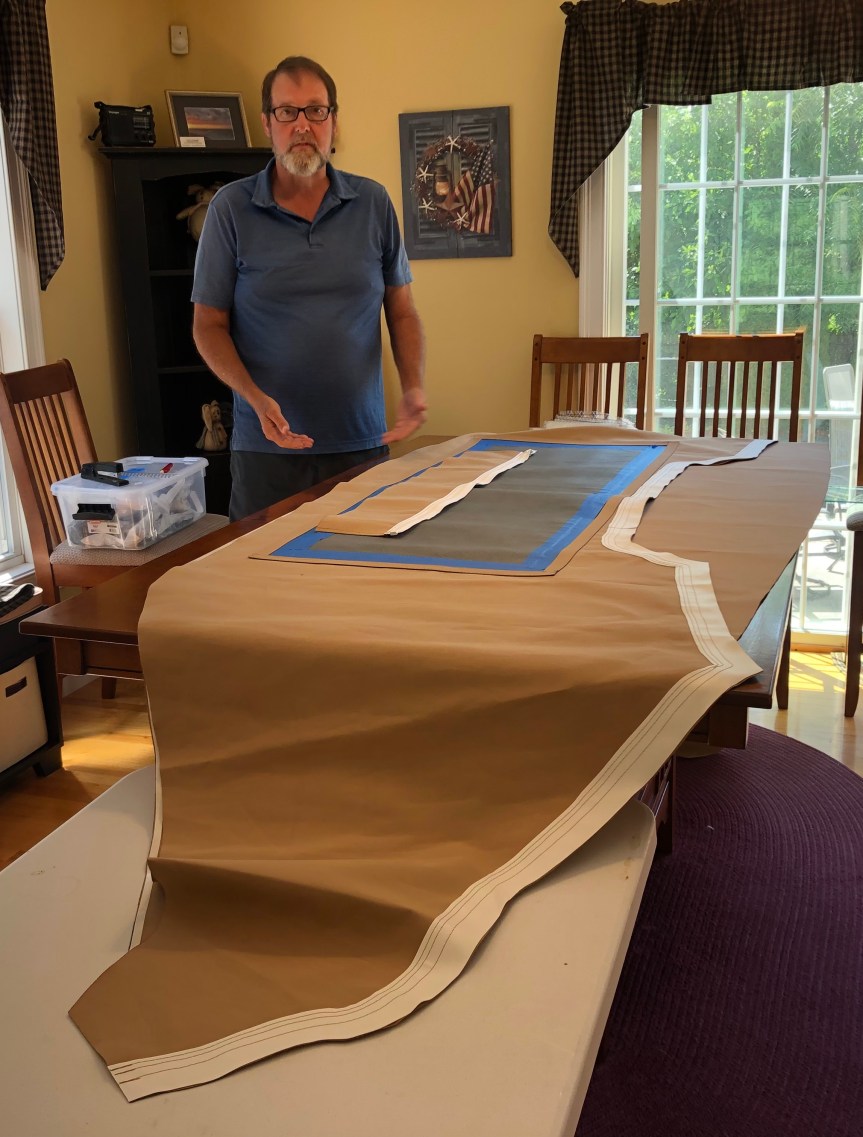
The top priority was a new bimini.  The bimini goes over the helm in the cockpit to protect the helmsman from the sun and rain.  I completed one right before we left in 2018 and immediately knew I wanted another crack at it.  I just wasn’t happy with how it looked.  Fortunately, switching our canvas color from navy to toast gave me the perfect excuse to try it again.

It’s amazing how much more experienced I’ve become with sewing canvas.  When I did the first bimini, it took well over forty hours and I struggled the whole time.  But this one?  I whipped it out in less than half of the time, sewing with confidence the whole way.  It was SO much easier than the dodger, and we’re very happy with how it looks.

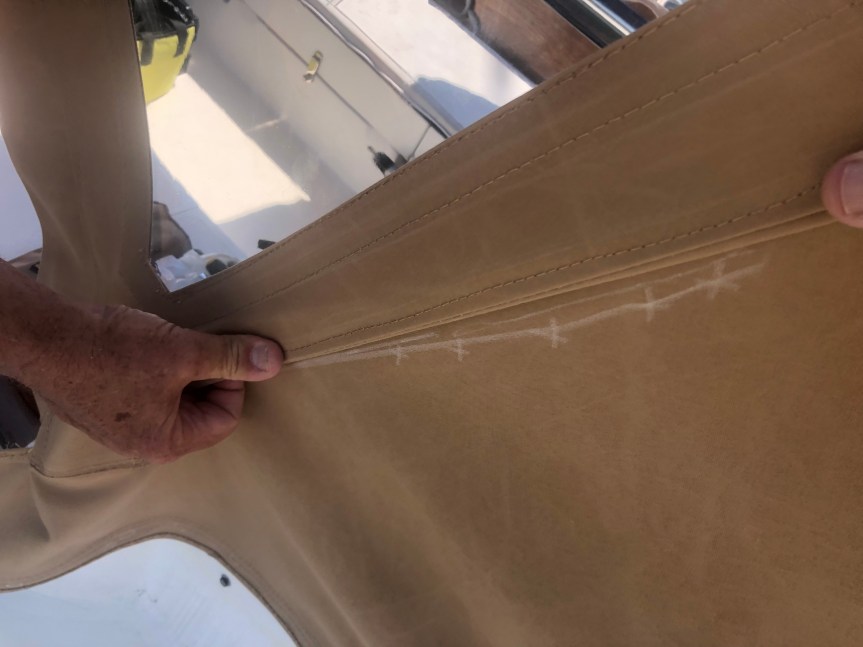
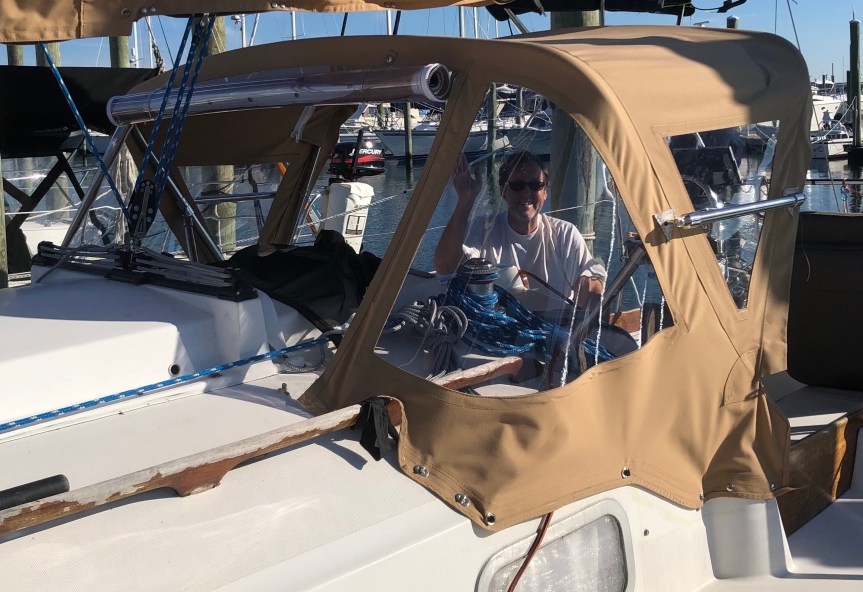
Once the bimini was finished, it was time to sew the connector.  Jeff has been advocating for a connector between the dodger and the bimini for quite some time, and although I really didn’t think it was necessary, I finally agreed just so he’d stop pestering me about it.  I thought it would be easy, but I hit a major roadblock partway through.  I couldn’t get the measurements to work according to the Sailrite video.  We made five or six trips from the clubhouse to the boat to test fit, and as the number of trips increased, so did the volume of my muttering given that I didn’t want to make the damn thing to begin with.  Finally we came up with a theory that resulted in the connector being WAY too large, so I trudged back to the clubhouse one last time to shorten it, hoping I wouldn’t make it TOO short.  Phew!  Success!

IMG_7163

Finally, after at least triple the anticipated hours, the connector was finished.  I’m not crazy with how it looks, so I’ll probably try again next summer.  However, I’ve admitted to Jeff that having a connector is AWESOME!  It provides SO much more protection in the cockpit from the sun and rain, and we can leave the boards out of the companionway on rainy days.  He was right.  Mark the date!

To round out the cockpit canvas, I sewed some weather cloths to give us more privacy and some protection from sea spray.  We’ve seen many of them with the boat’s name along the side and I really wanted to do that, but we ran out of time.  That will be a project for next summer.

IMG_7167 2

Last but not least, I sewed some seat covers for the Porta-bote.  Whoever was the genius that decided to design the dinghy with black seats should be summarily fired.  The seat covers were extremely straight forward, consisting of hemmed material and velcro, and they’ve worked out very well so far.

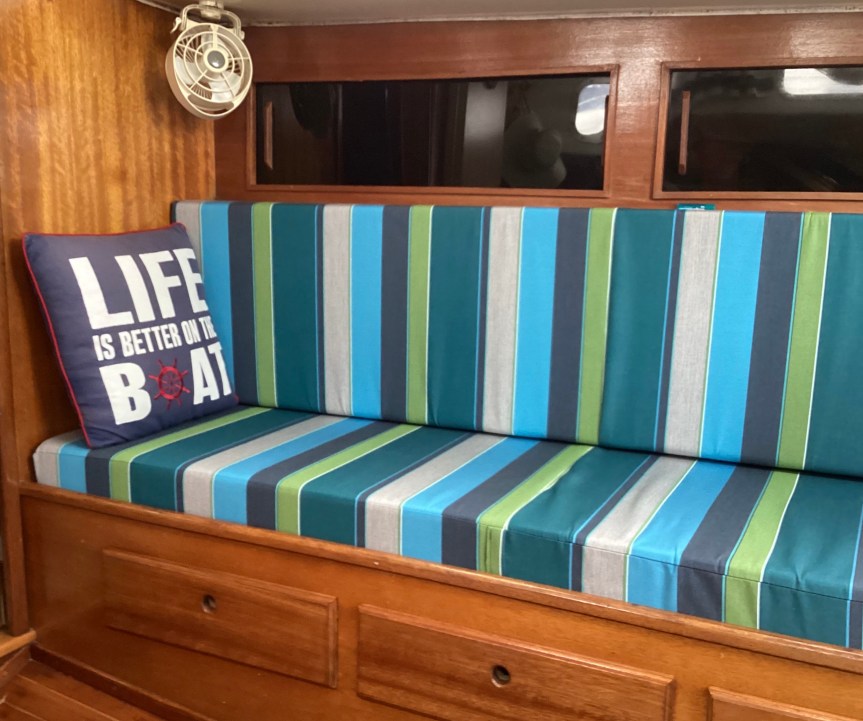
Phew!  When we were finished, Jeff mentioned that our friends on Lone Star and told him that we had done a TON of canvas work this summer.  Looking back at it, I realized they were absolutely right.  A mainsail cover, interior cushions, two throw pillows, a dodger, bimini, connector, weather cloths, and dinghy seats.  All of this plus a part-time job at Shenny, driving the launch and working at the t-head.

By the time I was finished, I was more than happy to put everything away one last time so that our friend Jeff from S/V Infinity could take it home and use it over the winter.  There will be a few canvas projects next summer, but for now I’m glad to be closing the sweatshop’s doors for the season.

Canvas (part two) – a new dodger and mainsail cover.

With the interior cushions complete, it was time to turn our attention to a new mainsail cover and dodger.  I had made a mainsail cover several years ago before we started cruising, but it was navy blue.  While that color works great in southern New England, we discovered it’s hot as hell down south.  In fact, when we were in the Chesapeake during Covid summer it was almost too hot to touch.

Jeff and I had MANY discussions about what color we should switch to.  He wanted tan, but I was decidedly not a fan until I found a shade I liked on a Shenny friend’s boat.  Unfortunately, he sold the boat last fall and couldn’t remember exactly what the color was called.  So we ordered about ten shades of tan samples from Sailrite to see if we could narrow it down.  I didn’t want anything too tan, but Jeff didn’t want anything too light.  We settled on Toast, and while at first I still wasn’t convinced, I’ve since decided that he was right. We’re both VERY happy with it.

Making the mainsail cover was relatively easy, particularly since I had done it before.  The challenging part was the lazy jack slits.  Despite my best efforts at measuring, they were off enough that Jeff needed to move the lazy jack hardware.  Once that was complete though, the cover looked great.  Now it was time to tack our hardest canvas project to date: the dodger.

IMG_6998
One mainsail cover – check.

A dodger is installed at the front of the cockpit to help keep wind and rain out of it.  Our old dodger frame was crooked and we had decided we preferred the added height, width, and depth of the Sailrite dodger frame, so we were truly starting from scratch.  One of the keys to a good looking dodger is a rock-solid pattern, so we spent several days making the frame and pattern.  It was VERY challenging with height changes and curves, but we finally decided it would be ok (we hoped).

Next, our good friends Jeff and Denise from S/V Infinity came to our rescue once again, allowing us to use their house as a canvas workshop while they went on vacation.  Yes, this was the same vacation that we were supposed to go on, but we knew we simply did not have the time given the projects we hoped to accomplish this summer, so we had VERY reluctantly decided to pass.  Instead I switched shifts with one of my co-workers, and we had four solid days to put our noses to the grindstone and knock most of the dodger out.

IMG_6966
Getting ready to sew the main window.

We worked as a team, following the Sailrite video step-by-step, and by the end of day four we were back at Shenny putting the dodger on the frame with bated breath.  Hmm.  It looked good, but we had a pretty substantial wrinkle along the side from excess material.  I posted for advice on the Sewing on Boats Facebook page, then we took it off the frame and sewed a dart.  Back on the frame it went.  Much better!

IMG_6979
Marks where we want to make our fix to remove the large wrinkle.

So were we finished?  Heck, no!  We wanted to be able to roll-up the main window for better ventilation.  Off came the dodger from the frame.  Back on the frame it went.  

Now were we finished?  No way!  The main window was much smaller than we had anticipated, leaving us with two large blind spots on the port and starboard side.  We needed to insert two fixed windows.  Jeff didn’t think it was necessary, but I insisted.  Off came the dodger from the frame so we could make the two fixed windows.  Back on the frame it went.  Jeff agreed that the visibility was now much better.

How about now?  Noooooo.  One of the things we liked about the Sailrite frame was that it had horizontal hand holds along the sides.  We still needed to make the cut outs for the handholds.  Off came the dodger from the frame.  Back on the frame it went.  

Why couldn’t we do all of this at once?  We felt once we made the cut for the roll-up window it might change the dodger shape a bit, so we wanted to wait to pattern the fixed windows until the roll-up was finished.  Then we thought the fixed windows could change the shape a bit for the cut-outs for the handholds, so we waited to pattern the cut-outs.  Was it necessary?  Maybe not.  But after putting in about sixty hours and spending a lot of money on the kit, we weren’t going to screw it up with a roll of the dice.  

Taking the dodger on and off wasn’t as simple as it sounds.  We needed to be very careful not to scratch the Strataglass, which is what the windows are made out of.  At $153.95 for a 54″ x 55″ piece, we preferred not to mess it up immediately.  We ended up with one small scratch which wasn’t too bad given how often the dodger was manhandled during the sewing process.

After the handhold cut outs were complete, were we finished?  YES!  Time for celebratory cocktails!

IMG_7069
We’re going to move the fasteners on the center bottom to stretch the material out a bit more, but otherwise it looks great!

IMG_7073
We added the two fixed windows on either side of the center window. As you can see, before we put them in the blind spots were huge.

So after all of that, are we happy with it?  Definitely.  The dodger turned out SO much better than we thought it would.  Frankly, we were shocked.  I was afraid it would be a wrinkled mess and it definitely isn’t.  Would we do it again?  We’d rather not.  However, given that we have more time than money, it was a no-brainer for us to give it a try.  The frame and materials alone were $1,700, and we were able to make changes and customize it as we went along.  The labor for a professional canvas maker would have easily been another $4,000.  So despite the sweat, angst, and occasional gnashing of teeth, we have no regrets.  Future canvas projects will seem easy-peasy compared to this one!

Canvas (part one) – new interior cushions.

Pegu Club came with a navy blue sail cover and dodger and green interior cushions.  The dodger and cushions were reaching the end of their lifespan when we bought her back in 2015, but we inserted new foam in the cushions and limped along with the dodger before it all gave up the ghost towards the end of last summer.  The cushions were tearing, Jeff was bottoming out on the settee from the wimpy foam, and the dodger leaked like a sieve.  So we knew coming into this year that we would be doing quite a bit of sewing on the Sailrite this summer.

I’ve blogged about our Sailrite before – it’s a fantastic machine and has more than paid for itself.  Sailrite has excellent step-by-step videos on YouTube.  Even if you haven’t sewn before, you can definitely do your own canvas work as long as you start slow (I recommend a tote bag) before working your way up to more complex projects.  Since it had been a few years since I’d sewn anything, I started by making a handful of totes to get used to the feel of the machine again before getting to the cushions.

IMG_6775
These Sunbrella totes hold up much better than the giveaway boat show totes.

Having made cockpit cushions already, I knew making interior cushions wouldn’t be too difficult.  The hardest part was going to be deciding what fabric we wanted to use.  Pegu Club is our home, and this was going to be a great opportunity to put our personal stamp on her decor.  We’ve always gravitated to a mid-century modern style, so after ordering several sample pieces it turned out to be a relatively easy decision.  The only tricky part was that the material was striped.  I had never sewn with stripes before, and I knew it was all-too-easy for it to end up mismatched.  We were going to have to be careful to make sure everything was lined up.

Lucky for us, we were able to use our good friends’ Jeff and Denise’s house to go on a sewing binge.  We drove up there on a Friday with all of our supplies and foam and took over their living room and dining room for the weekend.  We were SO grateful – we never could have sewed them on the Shenny picnic tables.  The cushions were simply too large.

We used the Sailrite “30 minute box cushion” pattern for three out of four of the cushions, although at well over 30 minutes per cushion, there was clearly some creative licensing going on by Sailrite in choosing that pattern name.  The fourth cushion was a traditional box cushion because it was angled due to the shape of the hull.  Jeff W. was a huge help to my Jeff when it came time to cut the foam, and I think he was amused by my occasional teeth-gnashing and seam ripping.

We had a few hiccups that we were able to improvise fixes for, but by mid-morning Sunday we were all driving down to Shenny for the moment of truth: would they fit?  Although I measured at least five times before we headed up to Jeff and Denise’s house, I was still pretty nervous that they wouldn’t.  So you can imagine how thrilled we all were to discover that they fit perfectly, the stripes matched up, and the foam provided plenty of support so that Jeff no longer bottomed out when he sat down.  Yes!

Even though we’ve had them now for well over a month, I still come down the companionway steps and think about how much I love this pattern.  Well worth the effort it took to make them, the cushions reflect our personal style and has made Pegu Club feel even more like our home.

Old cushions:

IMG_0042

New cushions:

IMG_0043

Troubleshooting our solar panels.

Perhaps the biggest “must do” task on our list before we left was making our bimini and installing solar panels.  While our 50 watt solar panel has kept up well over the past few years, we knew we would be demanding more from our electrical system when we cut the docklines.  We have minimal power requirements and weight is always a concern given Pegu Club’s size, so we decided to go with flexible solar panels.  While they aren’t as efficient or durable as hard panels, the weight savings alone (8 pounds for two that could be mounted directly on the bimini vs. 33 pounds plus a stainless frame for two hard panels) made it worth it to us.

We had ordered a bimini kit from Sailrite several months ago, and now it was time to get to work.  The kit came with the stainless steel tubes already bent, so all we needed to do was figure out what size we wanted the bimini to be, then cut them to the proper length.  Don’t let the simple description fool you into thinking that this was a quick process.  It most definitely wasn’t.  However, by the time we were finished cutting we had a bimini frame that Jeff could stand underneath, which made for a happy Jeff. 

Continue reading “Troubleshooting our solar panels.”

Making our bosun’s chair.

One of the items I started sewing before Christmas was a bosun’s chair.  A bosun’s chair is one of the less-expensive ways to get to the top of the mast.  Basically you sit in a seat, attach it to a halyard (and a backup line for safety), and someone uses a winch to hoist you to the top.  We figured that I would generally be the one going up because I’m lighter, making it easier for Jeff to hoist me vs. my hoisting him.  However, we needed to keep open the possibility that he might have to go up there.

Looking at the most common suppliers, we discovered that hoisting Jeff along with some tools would put him uncomfortably close to the weight limit of the chair.  Fortunately Sailrite had a kit that was not only cheaper, but also had the highest weight capacity of the options we’d seen.  After convincing Jeff that I felt comfortable enough in my sewing skills to make one by hand, I ordered it up.

Continue reading “Making our bosun’s chair.”

Sewing our foredeck bag.

When we decided to remove our furler and switch to a hank-on jib we knew that one of the things we would need to do is get a foredeck bag.  The foredeck bag is attached to the headstay and allows you to keep the sail hanked on when not in use.  When you’re finished sailing, simply drop the headsail, place it in the bag, and zip it up.  You can use the jib halyard to raise the bag off of the deck, and there the sail sits waiting until you need it again.

We could have purchased one, but as is typical with canvas work it was much cheaper to order a kit from Sailrite, saving us at least $40 compared to a pre-made bag.  Using their handy-dandy YouTube video along with the written instructions that came with the kit, this actually turned out to be a very easy project.

Continue reading “Sewing our foredeck bag.”

Cockpit cushions (and an engine update)

First up: the latest on the engine.  John Bayreuther was able to get to Pegu Club last week and the engine has been fixed.  He told Jeff that he found a cracked washer that was letting air in, and there was also a lot of air in the injector.  He ran the engine twice and all was well, so we are back in action.

This was an inexpensive fix as far as boats go so we’re holding off on replacing the engine until this winter, but we’re definitely getting a new one.  Up until now Thumper has been rock solid for us, but it’s 40 years old, some parts are becoming unavailable, and we have no idea how it was treated by Pegu Club’s many prior owners.  On top of it all, as a single cylinder diesel Thumper is LOUD!   A new engine will certainly be expensive, but it will also be smaller, lighter, (hopefully) reliable, and much quieter.

In the meantime the guys are squeezing us in to the launch schedule so splash is this Saturday at 9:45 a.m.  Yay!

Just because our splash was delayed didn’t mean that all boat projects stopped.  In fact, one big project that we managed to essentially complete during our unexpected down time was finishing up new cockpit cushions.  I say essentially because we still have to make the helm cushion, but the port and starboard cushions are done and those were the two longest ones.  The helm cushion should be much easier by virtue of its size.

Pegu Club originally came with vinyl covered cockpit cushions.  Unfortunately they were hard as a rock and also suffered from the same smell that the rest of the boat came with, so out they went.  I had never made cockpit cushions before, but with my trusty Sailrite and the detailed Sailrite video on YouTube I figured I’d give it a go.

Continue reading “Cockpit cushions (and an engine update)”

Beating the heat.

The week leading up to the weekend of August 13th was hot and humid.  Temps were in the 90’s and it was thick-air-like-breathing-through-a-wet-blanket humid.  At one point I did a comparison of the temps and dew points between West Hartford and Sarasota, FL, and they were the same.  I’ll take it over winter any day, but with no air conditioning in the house I was looking forward to heading to the boat.  Unfortunately, work was interfering so heading down on Friday evening was out, but I went to work at 6:30 a.m. on Saturday in the hopes of salvaging some of the weekend, and by mid-afternoon we were driving to Shenny.

Continue reading “Beating the heat.”

It’s curtains for you!

After struggling mightily with sewing winch covers, it was time to tackle a sewing project that was easier – curtains.  No sewing circles into tubes this time.  After watching the Sailrite video on YouTube it was obvious that all I needed was to make a few straight cuts, a few straight hems, and I’d be all set.  Well, close but not quite. Continue reading “It’s curtains for you!”

Interior Cushions? Finished! (For now).

Mother Nature conspired against us this past weekend to ensure that it was not a particularly productive two days.  Going into it we knew that Saturday was going to be cold and rainy all day, and Sunday was going to be even colder (upper 30’s) with wind gusts over 50 mph.  So we did what we could.

Saturday we drove down to Defender for the annual Warehouse sale.  Armed with our list, we debated asking for Defender’s checking account number so we could simply have our next paycheck direct deposited into their account.  We settled for giving them our credit card instead. Continue reading “Interior Cushions? Finished! (For now).”